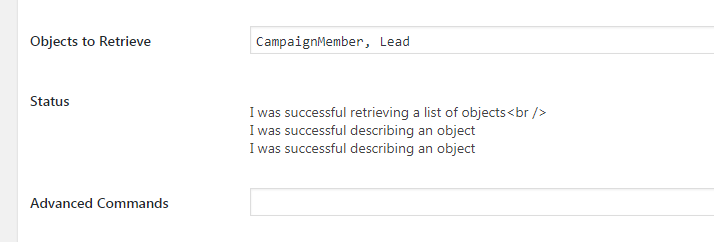
The best place to solve your WordPress to Salesforce connection challenges is your Ninja Forms Settings page Salesforce Section. Here is a quick screen shot of what it looks like:
Each line in the status is one step of the last communication and knowing that helps you read through it.
In this example, see that the plugin retrieved a list of Salesforce objects, then described an object twice. I purposely chose this example because, as you see immediately above, I had requested to retrieve two objects- CampaignMember and Lead. From this, you can now surmise that the plugin connected to Salesforce, got a list of objects, and then described two of them.
Currently, the wording may seem strange to you and I’m working on that. As I continuously improve the plugin, I am adding enhancements to improve readability. For now, however, I will strive to document not only the responses from Salesforce, but what you can do about it.
Another Example
Here is another sample screenshot to get your comfortable reading them:
Here, I created a form to add a Lead to Salesforce. My status starts with “Lead:” which tells me the specific object I am sending. Next, the details tell me I was successful adding it to Salesforce. – yay –
If you are creating multiple objects, like an Contact and an Account, they are listed in order created. Be aware that the order you set up on the form may not be the order they appear here. The plugin in sorts your form data to add things in the optimal way for adding them to Salesforce.
Going Forward
As you develop your forms, make this section the first place you look to solve issues. I like to keep this page open on one tab and on my form design on another. In doing so, I can quickly go back and forth, testing a new field then seeing how it worked. Salesforce is powerful, and it has rules for data that keep it robust. If your form didn’t get through to Salesforce, this page will tell you the rules to follow. From there, you can adjust accordingly and finalize your WordPress Salesforce connection.

